ArsCurios
This mod is a library dependency of [**ArsArms**](https://modrinth.com/mod/arsarms).
ArsCurios is a library mod which adds shared common code that mumu17’s mods use, this mod provides nothing of value without another mod activating it or using it.
ARRP but it’s Different but it’s Still ARRP
# Advanced Runtime Resource Packs but it’s Different but it’s Still ARRP
ARRP But Different allows developers to dynamically create assets and data at runtime, allowing
developers to not have to pack extreme amounts of resources into mods for things such as dynamic,
mod-dependent, item generation.
### Note
ARRP But Different is a fork of the [ARRP](https://modrinth.com/mod/arrp) mod. This mod has made
changes to the system ARRP used, and also supports the NeoForge mod loader.
## Status
ARRP But Different is still in a beta state. Please report any issues and bugs you find.
### Support
Supports the same generators that the original ARRP mod did, with some small syntax differences.
### Events
Fabric supports all events. NeoForge _only_ supports “BeforeUser” currently.
## FAQ
### Is this compatible with resource packs?
Yes, just like the original ARRP mod, this mod creates “fake” resource packs that are the second to
last in priority. This allows any other resource pack to override the resource packs created through
this mod.
However, this means that Runtime Resource Packs (RRPs) cannot override resources created by other
mods, but can still override Minecraft’s resources.
### Is this compatible with the original ARRP
No, this mod makes changes to the syntax and systems that ARRP used.
## NeoForge Support
This mod also supports NeoForge alongside Fabric, but there is one small piece that does not translate
nicely between the two loaders. The NeoForge version does not support all the entrypoints that the
Fabric version does due to the way mod loading works.
## Using ARRP But Different
For information on how to use ARRP But Different, refer to the [docs](https://arrp-but-different.readthedocs.io/en/latest/).
For resource pack creators looking to add support for generated resources, refer to the [resource
dumping page](https://arrp-but-different.readthedocs.io/en/latest/dumping-resources).
## Special Thanks To:
* [Ueaj Kerman](https://github.com/Ueaj-Kerman) for developing the
[original ARRP mod](https://github.com/Ueaj-Kerman/ARRP).
* [Misode](https://github.com/misode/) & contributors for developing
[datapack generators](https://misode.github.io/).
* The [Minecraft Wiki](https://minecraft.wiki) and its contributors for keeping track of all the
various formats used by data and resource packs.
ARRP
An api for fabric that allows for the generation of resourcepacks at runtime via code.
This allows you to add recipes/loottables/models/blockstates without json and in code, as well as allowing conditional resources. All while being compatible with normal resource packs.
Armstrong

**Armstrong** is a simple plugin that utilizes [Lunar Client](https://lunarclient.com)’s [Apollo API](https://github.com/LunarClient/Apollo).
**Found a bug or have a feature idea?** Use the [issue tracker](https://github.com/Vaption/Armstrong/issues)!
[](https://modrinth.com/plugin/armstrong)
[](https://github.com/Vaption/Armstrong/releases/latest)
[](https://github.com/Vaption/Armstrong/blob/main/LICENSE)
## ⚖️ Armstrong vs. LunarUtility
Originally the goal was just to migrate the codebase to use Apollo rather than the old BukkitAPI.
During the migration, I noticed that Apollo (on its own) now does some of what this plugin once did.
So, the waypoints & disabled-mods module have been removed from this plugin (now configurable in Apollo).
The cooldown module implementation was also removed, but will come back to it at a later time!
## 🙌 Credits
Armstrong is based off of [LunarUtility](https://github.com/RefineDevelopment/LunarUtility). All credit to the original developers!
👨💻 **Contributors**
– 🏙️ [Dubai](https://github.com/GamerRealm) – Original Author
– 🛠️ [Komek](https://github.com/Komeek) – Maintainer
– 💡 [kayalust](https://github.com/kayalust) – Contributor
## 📥 Installing
1. Download the jar from [releases](https://github.com/Vaption/Armstrong/releases)
2. Download LunarClient’s Apollo API jar from [here](https://github.com/LunarClient/Apollo/releases)
3. Drop **both** jars into all your servers
4. Edit the configuration files to your liking
## 📜 Terms of Use
– No selling or claiming this project as your own
– Please respect & credit the developers
## ✨ Features
🏷️ Nametag
Enabled by default, configurable in `config.yml`.

🔒 Require Lunar Client
Disabled by default. Enable by setting `REQUIRE-LUNAR` to `true` in `config.yml`.

🛡️ Staff Mods
Requires `armstrong.staff` permission. Toggle with `/lsm `.

🌙 Player on Lunar Client
Requires `armstrong.players` permission. Check if someone is using Lunar Client with `/lc `.

📋 All Players on Lunar Client
Requires `armstrong.players` permission. Get a list of players on Lunar Client with `/lc players` (or `list` / `users`).

Armour Weight
# Armour Weight
Requires [cloth config](https://modrinth.com/mod/cloth-config)
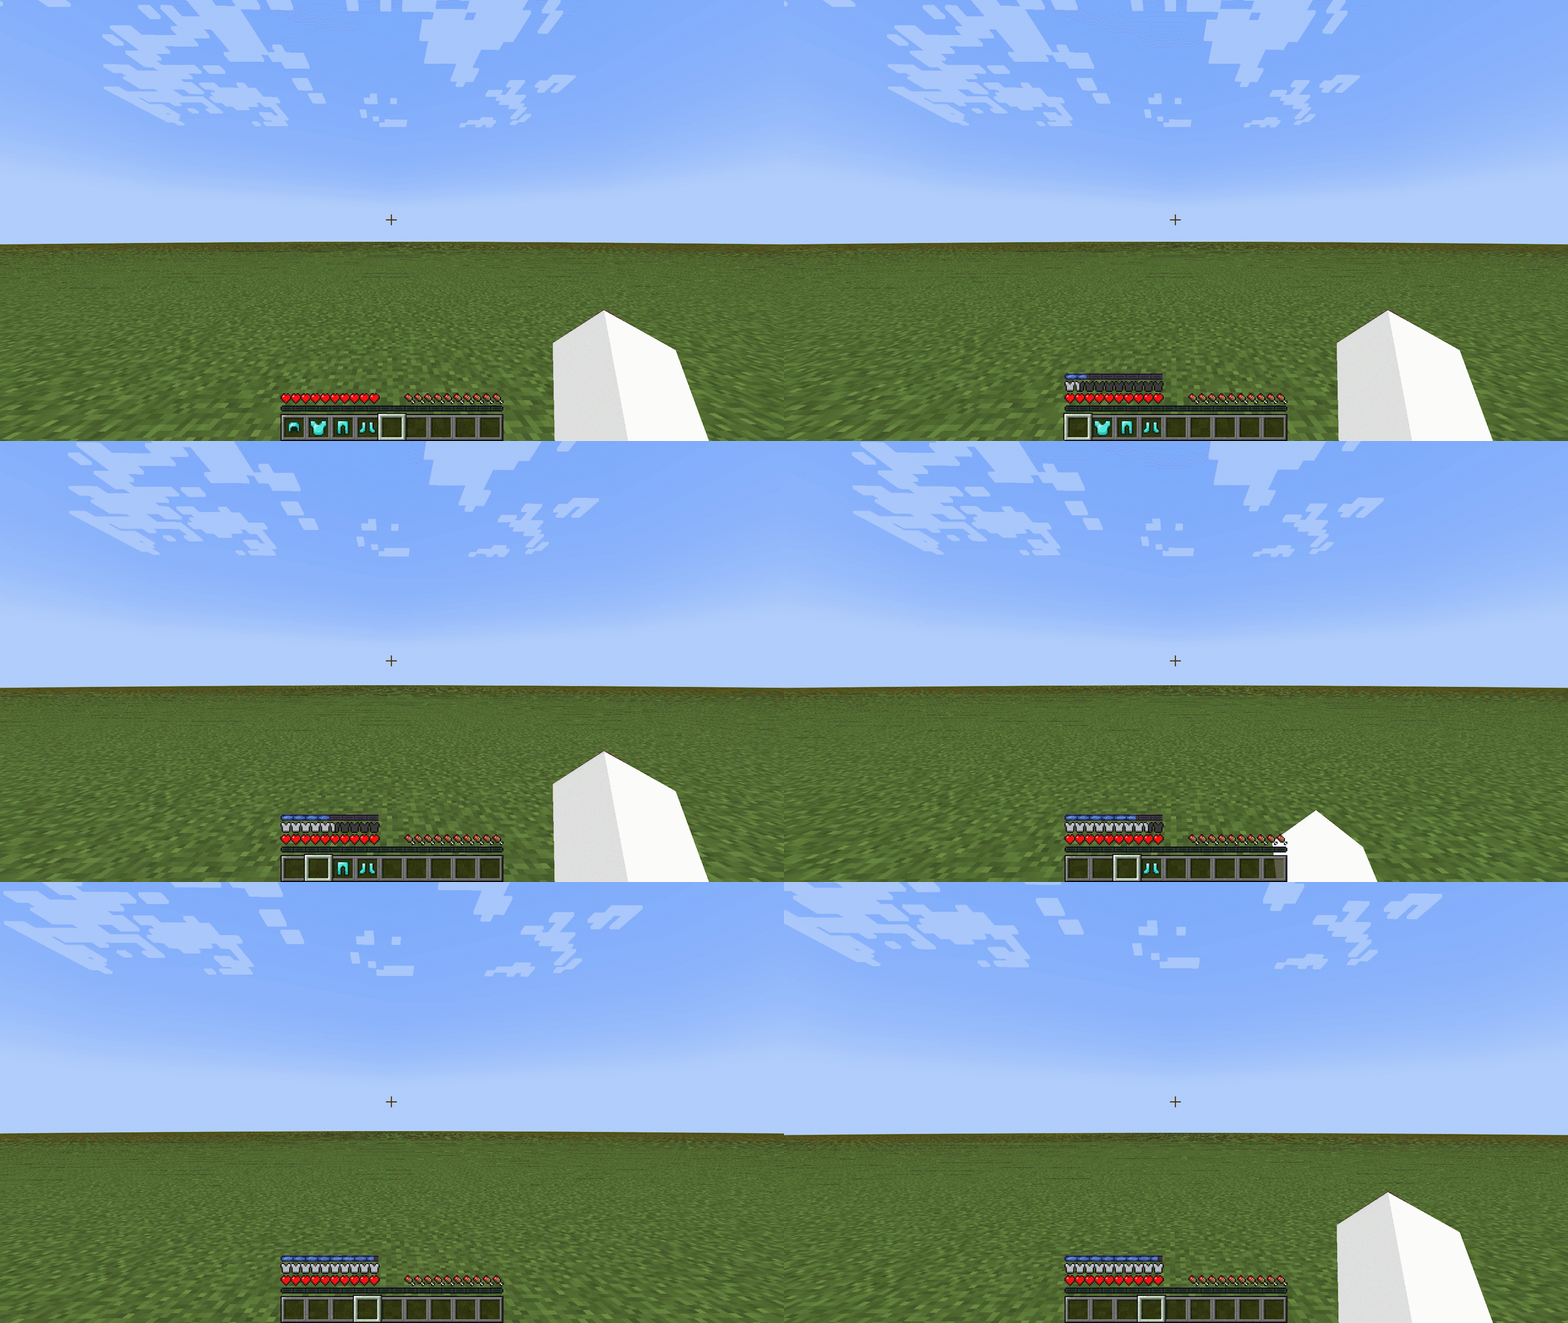
**Armour Weight** is a _very_ configurable utility/game mechanics mod. Where players used to go into battle with full netherite has now been replaced with a much better system that **prioritizes unique armour layouts**. Players will now have to account for the weight of their armour, with heavy armour offering better defence at the cost of lots of speed.
## Developers
**Armour Weight has an [API!](https://github.com/AnOpenSauceDev/Weight)** _see wiki for documentation_
This allows you to _easily add your own weight definitions for your modded armour in [just 2 lines of code](https://github.com/AnOpenSauceDev/Armour-Weight-Integration)._ (smaller code snippet below)
“`java
public static armourWeightDef exampledef = new armourWeightDef(armourType.CHEST,1f,Example_Chestplate); // define the weight for our example chestplate
@Override
public void onInitialize() {
WeightUtil.addElement(exampledef); // register our armour
}
“`
Armour Weight also **has datapack support** _(1.4 and up)_, allowing you to define weight easily with **zero programming knowledge!**
In `data/armourweight/weightdata/[any name].json`…
“`json
{
“id_namespace”: “your_mod_id”,
“id_path”: “your_item_name”,
“weight”: PUT_NUMBER_HERE,
“type”: “type_here”
}
“`
`id_namespace` – your mod id’s namespace, (i.e. the `minecraft` in `minecraft:dirt` )
`id_path` – your mod’s path name (i.e. the `dirt` in `minecraft:dirt`)
`weight` – how much your item weighs (decimal values allowed).
`type` – what type your armour is. Can be: `boots`,`head`,`chest`,`leggings`. Anything else will be treated as `other`.
please note that Armour Weight **will generate weights automatically if it thinks a weight value is broken/doesn’t exist,** so make sure it’s actually using YOUR weight value.
## Modpacks
You are 100% allowed to bundle this into your Modpacks!
## planned features
– [Trinkets](https://modrinth.com/mod/trinkets) support
– a much more robust config setup.
Armored Arms
A small client mod that adds first-person visualization of armour on the hand, as well as enchantments.
Should be compatible with most armour.
If you find any incompatibility, write to me on [GitHub](https://github.com/Artur114Projects/Armored_Arms/issues) or [Discord](https://discordapp.com/users/1014653093163565166) and I’ll fix it!
**Files starting with ! have critical errors, do not download them.**
## Configs
> **[Disable rendering arm wear with armor equped] default: true.**
– If true then wear on hands with armor on will not be rendered
> **[Enable rendering arm wear for vanilla armor model] default: true.**
– If true then the wear on the hand will be drawn if the current armor uses the vanilla model
> **[Blackist armor for rendering] default: [minecraft:*].**
– Add to this list the armor id that you do not want to see on your hands.
– modid:* means all items from the mod, *:itemId means items from all mods with this id.
– example: galaxyspace:space_suit_chest
> **[Vanila armor model size] default: 0.4.**
– In vanilla by default 1.0, some mods use vanilla armor model,
– but it is too big and looks ugly, so 0.4
> **[Use chek by item] default: false.**
– It will be more optimized especially with electric armor,
– but in theory if the stack changes its model while it is equipped then
– the changes will not be displayed on the hand,
– but I have never met such a thing,
– if you have met you can turn it of
Armor Render Lib

Armor Render Lib is a lightweight extension library to Fabric API’s fabric-rendering-v1 [ArmorRenderer](https://github.com/FabricMC/fabric/tree/1.18.2/fabric-rendering-v1). Since the Fabric API implementation is quite abstract, a more targeted implementation is needed for some specific use cases. These use cases are present across more than one of my mods, so in the spirit of code reuse this library was created. It is robust, using only a few very targeted mixins and is fully compatible with Cosmetic Armor and GeckoLib.
### Build
To include this library in your project, copy the following into your `build.gradle`:
“`gradle
repositories {
maven {
name = “Modrinth”
url = “https://api.modrinth.com/maven”
content {
includeGroup “maven.modrinth”
}
}
}
“`
“`gradle
dependencies {
modImplementation “maven.modrinth:armor-render-lib:”
include “maven.modrinth:armor-render-lib:”
}
“`
### Use
Armor Render Lib adds armor render layers. These are objects containing a dynamic texture location, color and glint boolean that render armor for an item (or items). They are roughly equivalent to Fabric API’s [ArmorRenderer#renderPart](https://github.com/FabricMC/fabric/blob/f14603e8624d4cb192846321c429cc00c9ef6f55/fabric-rendering-v1/src/main/java/net/fabricmc/fabric/api/client/rendering/v1/ArmorRenderer.java#L69), but the texture, color and glint can be dynamically specified based on the `ItemStack`, `LivingEntity` and `EquipmentSlot`.
They should be registered like so:
“`java
public class ExampleMod implements ClientModInitializer {
private static ArmorRenderProvider render(ItemStack stack, LivingEntity entity, EquipmentSlot slot) {
// Dynamic texture path
String texture = “examplemod:textures/model/armor/example_chestplate.png”;
// Dynamic color
int color = 0xFF00FF;
return data -> data.accept(texture, color, stack.hasGlint());
}
@Override
public void onInitializeClient() {
ArmorRenderLib.register(ExampleMod::render, Items.IRON_CHESTPLATE);
}
}
“`
### Notes
– An item can have multiple different armor render layers registered to it.
– Multiple items can have the same armor render layer registered to them.
– Registering a render layer to a vanilla item (or other armor item) overrides the default armor rendering.
– This means that the texture, color and/or enchantment glint of vanilla armor can be modified.
arichat

[CurseForge](https://www.curseforge.com/minecraft/mc-mods/arichat) >>> [GitHub](https://github.com/kiraririria/arichat) >>> [Instruction](https://kiraririria.github.io/arichat/)
**Arichat** is a Minecraft mod for **1.12.2 forge** and **1.20.4 fabric**
Adds AI-RolePlay to Minecraft via Headless Automation of [Agnai](https://github.com/agnaistic/agnai) website
The following are 2 blocks: Description, Instruction
(The translation is available on the website)
## Description
Arichat – a mod whose task is to connect Minecraft with a site connected to AI.
(On the current version of the mod, this site – Agnai, which has connects its frontend interface, which simplifies the work with different with AI models, such as role model).
To put it simplistically, the mod adds Role-Play with Artificial Intelligence to the functionality of Minecraft
By creating a character card, uploading it to the site, you will be able to communicate with it within minecraft.
Using this mod in conjunction with others, you will be able to create a physical representation of the character in the game, and his behavior will be built with the help of Arichat, and therefore based on a neural network.
It is important to realize that Arichat is not a neural network model, but a connector.
The quality of the character will depend on which model you choose/purchase, and how you prescribe the character/schemes/scenarios.
If you describe the process in a complicated way, it goes like this: Agnai is a shell over the neuro-model, and Aricat makes a minecraft shell for the shell for the neuro-model. Simplified description: adding Ai characters to minecraft.
Please read the usage section before using the mod
### Warning: Arichat test mod to demonstrate features. Updates and support for the mod from the author will most likely be missing.
However, do not be upset, in the instructions I will tell you everything in detail. If you run the mod at all, you will be able to figure it out
## Instructions
Arichat uses “test automation”, so the program will be driver-browser driven
I’ll outline the obvious limitations right away:You need internet
– You need a browser (The author recommends installing Chrome if Arichat does not work with your browser).
– In case of an error, there is a high probability that the driver will hang as a process. In that case, you can find it via Task Manager to disable it
– If everything is working correctly, the managed browser will store data such as: site data, themes, extensions
Since, many sites have ads in them, the author recommends installing the free adBlock Plus extension at the first startup
If you use the browser without a shell, ads should not interfere with the program in theory, however, there is a possibility that they will.
How does the automation work? When you start the client, the mod starts downloading a webdriver for your browser, after which it will be launched.
You will have a “clean” browser open, you can use it like normal browsers, however, it is completely controlled by the automation program.
Going to the site, clicking on buttons, filling in fields, getting data from the site. The important thing is that the browser shell visible to us is not mandatory for the program
When you want to move from development to testing, you should enable headless in the mod config, and then restart the game.
This way the interaction between the program and the browser will be invisible to you.
Okay, now we have a simple understanding of what Arichat does. Think of it as if you were working with a browser through the game.
Digression: there is a chatmod parameter in the mod config, if it is active you will be able to interact with characters via chat and commands.
However, originally the mod was created for the creators of minecraft maps, which means that assumes that you will work with it through scripts
(Examples of scripts later)
Areas


Requires the library mod Collective.
This mod is part of The Vanilla Experience modpack and Serilum’s RPG Bundle mod.
Areas is a mod which allows any player to easily created named areas in a world. This can be an area, region, zone, town, kingdom etc. This is done with a placed sign. On it you specify the radius, optionally the rgb value and the name. This means that the radius around the sign is now considered an area. Whenever a player enters this area, they receive a message at the top of the GUI with (by default) “Enter the area.”. And when they leave “Leaving the area.”. This can both be changed in the config.
Names are randomly selected when the sign does not contain one. There is a global RGB value for the messages specified in the config, but this can also be a unique value again specified on the sign. See the examples below for a better idea of how it works!
You can make areas overlap in order to create different area shapes. The join/leave message will only show when entering for the first time or leaving every overlapping zone.
Works in multiplayer, but players must also have the mod installed on their client.
Configurable: ( how do I configure? )
giveUnnamedAreasRandomName (default = true): When enabled, gives signs without an area name a randomly chosen one from a preset list.
radiusAroundPlayerToCheckForSigns (default = 100, min 0, max 1000): The radius in blocks around the player in which to check for area signs.
defaultAreaRadius (default = 30, min 0, max 1000): The default radius for areas when it’s left empty on the sign. It will be added automatically.
sendChatMessages (default = false): When enabled, sends the player the area notifications in chat.
showHUDMessages (default = true): When enabled, sends the player the area notifications in the HUD on screen.
showEnterMessage (default = true): Whether a message should be sent when a player enters an area.
enterPrefix (default = “Entering “): The prefix of the message whenever a player enters an area.
enterSuffix (default = “.”): The suffix of the message whenever a player enters an area.
showLeaveMessage (default = true): Whether a message should be sent when a player leaves an area.
leavePrefix (default = “Leaving “): The prefix of the message whenever a player leaves an area.
leaveSuffix (default = “.”): The suffix of the message whenever a player leaves an area.
showHUDTextShadow (default = true): Whether the text shown should be drawn with a shadow.
HUDMessageFadeDelayMs (default = 4000, min 100, max 360000): The delay in ms after which the HUD message should fade out.
HUDMessageHeightOffset (default = 10, min 0, max 3000): The vertical offset (y coord) for the HUD message. This determines how far down the message should be on the screen. Can be changed to prevent GUIs from overlapping.
HUD_FontSizeScaleModifier (default = 1.0, min 0, max 10.0): Increases the font size of the text in the HUD message. If you change this value, make sure to test the different GUI scale settings in-game. 6.0 is considered large.
HUD_RGB_R (default = 100, min 0, max 255): The red RGB value for the HUD message.
HUD_RGB_G (default = 200, min 0, max 255): The green RGB value for the HUD message.
HUD_RGB_B (default = 50, min 0, max 255): The blue RGB value for the HUD message.
Commands:
/areas – Shows all area signs around the player.
Show Spoiler

Examples:
To create an area with a radius of 10, use one of these prefixes. They do the same, choose which one you prefer:
This will create an area with a random name by default.

A simple example; a desert island area with a radius of 10:

Entering the desert island:
Show Spoiler

When breaking the sign, the area ceases to exist:
Show Spoiler

Another example with a custom colour; A savanna village area with the rgb value after the [RGB] prefix:
These three signs result in exactly the same.

Entering the savanna village:
Show Spoiler

Leaving the savanna village:
Show Spoiler

An area being randomly named with a radius of 30:
Show Spoiler

Another randomly named area with a radius of 20:
Show Spoiler

And another example with an unnamed area with a radius of 5 by not entering a name, and the config option ‘giveUnnamedAreasRandomName’ set to false:
Show Spoiler

——————
You may freely use this mod in any modpack, as long as the download remains hosted within the Modrinth ecosystem.
Serilum.com contains an overview and more information on all mods available.
Comments are disabled as I’m unable to keep track of all the separate pages on each mod.
For issues, ideas, suggestions or anything else there is the Github repo. Thanks!
Area Lib
# Area Lib
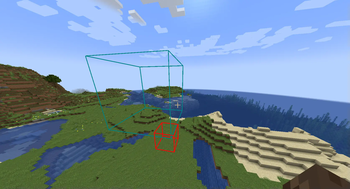
## Creating areas
Create areas using `/area create`
For example `/area create box ~ ~ ~ ~5 ~5 ~5` creates a 5x5x5 box area
## Modifying area properties
You can change some built-in properties, such as color and priority using
`/area modify `
## Union areas
You can create union areas using
`/area create union <...areas>`
Adding additional sub-areas can be done using
`/area modify_composite add `
Similarly you can remove a sub-area by running
`/area modify_composite remove `
## Deleting areas
To completely delete an area use
`/area delete `
## Querying areas
To check which area you are currently in, use
`/area query`
## Functionality Note
Note that these areas don’t do anything by themselves, but require additional mods that can implement specific functionality for them. For example [area-tools](https://modrinth.com/mod/area-tools) adds various area related tools using this library